There are a number of reasons as to "why" you could be getting this error message, so let's just focus on "how" to fix it.
Every user is assigned and allowed to do different actions for files and folders. These can be viewed and managed all in the same place. To fix the problem you are having, you need to take ownership of the file or folder you are experiencing the problems from. You may already be the owner but may not have permission to do what you are needing to do.
Create a Restore Point now to make sure if you make any unwanted changes, you can refer back to the way your computer is currently running. That way if you do not know how to undo what you did, you can easily restore to this point now.
Open Windows Explorer and navigate to the problem file/folder.
Right click and select properties.
Select the Security tab.
 TAKING OWNERSHIP
Click Advanced

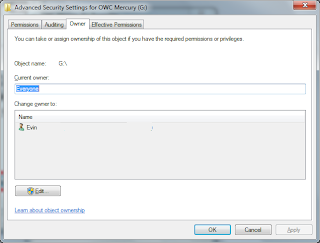
Select the Owner tab.

Here you can see what owners are available to be assigned.
To change to one of the shown owners OR to create a new owner, select EDIT.
If a window pops up asking if you want to allow the computer to make changes, select YES.
Under Change Owner To, click on the user you want to take ownership and select APPLY. If the user you ant to take ownership is not show in the box, click on Other Users or Groups.
Duplicating steps
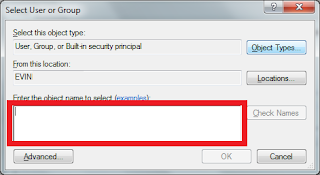
Type in the name of the user/group you are wanting to use instead. Check Name will appear clickable once you enter the name or group. Select this to check it validity.
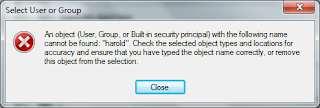
 You will get an error message if what you enter is not valid for use.
 If you are unsure of the name you are looking for, you can select Advanced then click Find Now to show a list of all the RDN's on your computer (or Relative Distinguished Names).
Click the one you want to use and select OK.
Now that name is in that box and underlined, select OK again.
This name will now be under the Change Owner To box. Click on the new name you just added and select Apply.
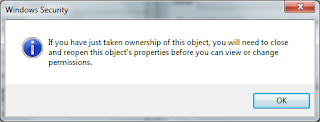
A window will appear telling you have just taken ownership, select OK.

Under Current Owner, it will now show the newly select name. Select OK.
Now we are back on the security tab.
GRANTING PERMISSIONS
While on the Security tab, click Edit.
To view permissions, click on each RDN in the top box. In the lower box, you will see Allow and Deny. The ones that are check marked are the current permissions. As you can see from the screenshot, I have Everyone selected in the top box so the below box is showing me Everyone's permissions.

Review each users permissions to find where you may be having the problem you are experiencing. If a user is not found in the top box that you want to allow permissions for, select Add.
Refer to the duplicating steps section above for more on adding users.
Once you make any changes and select Apply, be ready to wait for a little bit of time as the permissions are being set. Depending on how many changes you make will depend on how long it will take to process.
After taking both the above steps of Taking Ownership and Granting Permissions, you should not run into the same administrator privileges error message again. If you do, simply follow these steps again to find the permission that is not allowed and double check that you are the owner.
HINT: If this is a home computer and no one else uses it, I would suggest allowing all under each RDN just to be sure you are allowing yourself from every angle possible.
ENJOY!


